If you are going to tackle some DIY electrical projects at home, you will probably run into at least one of the 7 wiring mistakes in this article and video. I’ve found many of these in our home and I’ve heard many other people comment on these over the years.
Mistake #1: Backstabbing
When you remove an outlet or switch from the box, you might find the wires pushed into the back of the device like you see here.
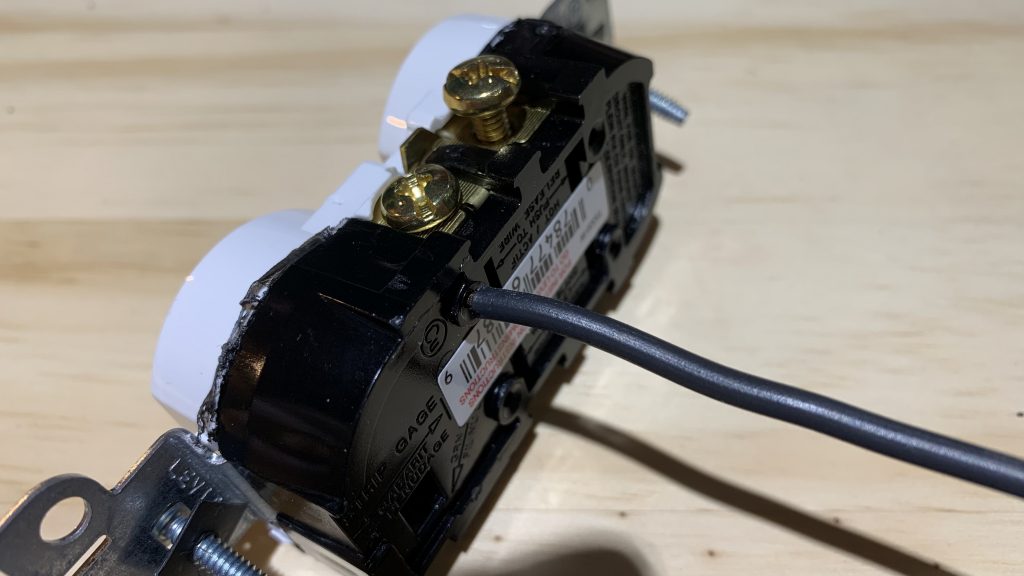
This is commonly called backstabbing and we had it a lot of places in our house. Electricians do this because it’s the quickest way to get a device wired and move on to the next one. The problem is, is that the tiny pieces of metal inside the outlet or the switch that hold that wire in aren’t very strong, and they often become loose and the wire comes out. This is exactly the problem I had with one outlet. It stopped working and I couldn’t figure out why until I took it out of the box. The wire fell out of the back of the outlet!
What you need to do is to cut the wires off the back of the outlet and then throw the outlet away because you’re going to wire the new outlet putting the wires around the terminal screws. If you did that with the old outlet, those little stubs of wires sticking out of the back would now be live, and that would be dangerous. So replace the entire outlet with a brand new one
Mistake #2: Incorrect stripping of the wires
Look at this wire.
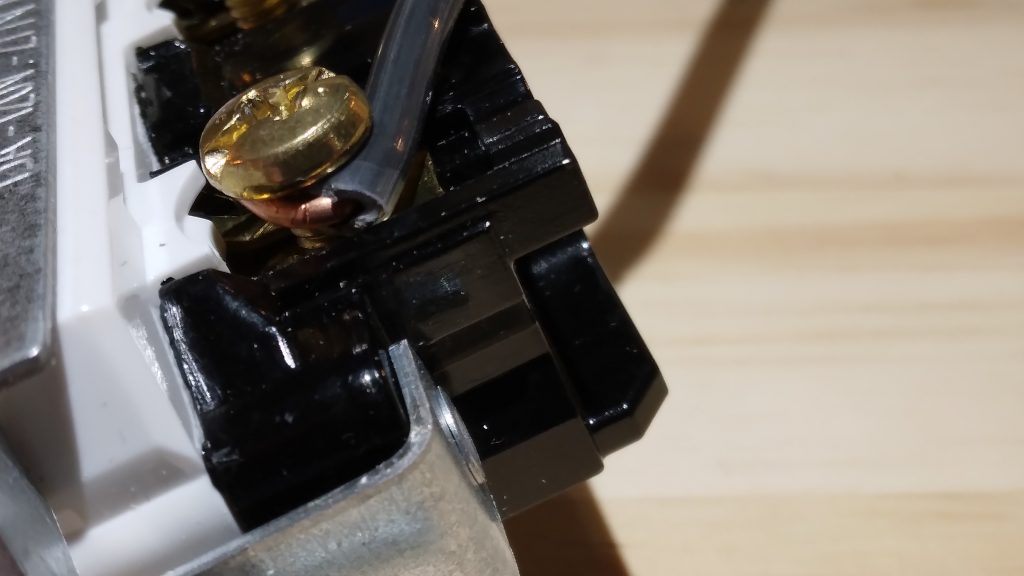
It’s wrapped around the terminal screw, but it hasn’t had enough insulation stripped off, so it does not have a good connection because the insulation is in the way.
Look at this wire.
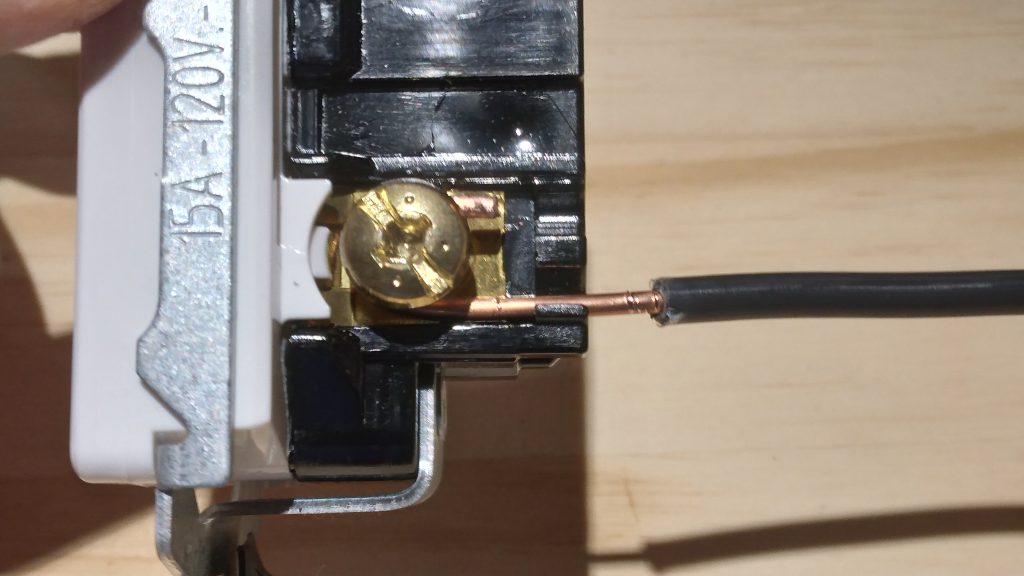
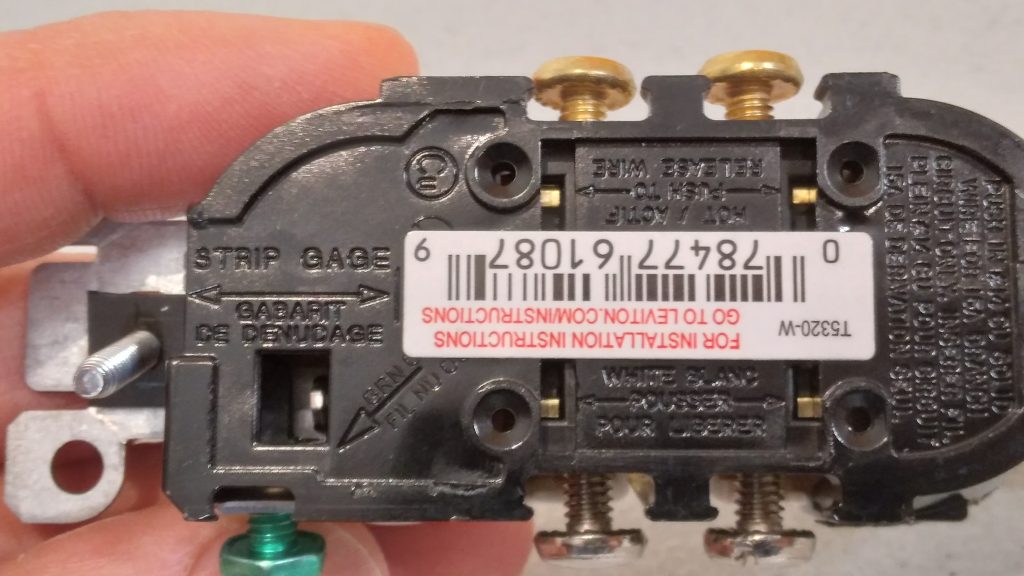
This wire has too much insulation stripped off and it’s dangerous because the wire could touch another wire in the box. In both cases you need to use the strip gauge on the device to strip the correct length of insulation from the wire before wrapping it around the terminal screw.
Mistake #3: Multiple wires under a terminal screw
Look at this light switch.
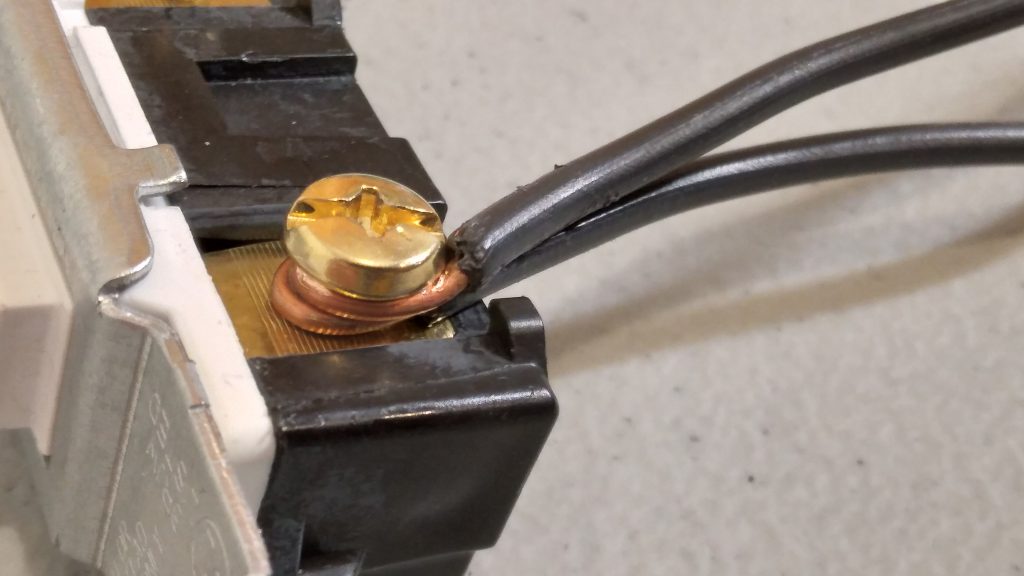
You can see that they’ve wrapped two wires around the terminal screw. That’s likely because they needed to continue the line wire onto another switch. You find this commonly in multi gang switch boxes. Terminal screws are only allowed to have one wire underneath them. The pressure of two wires underneath can cause either a poor connection or one of them to pop out.
If you’re replacing the switch, see if the new switch has a plate that allows two wires to go underneath it like this one.
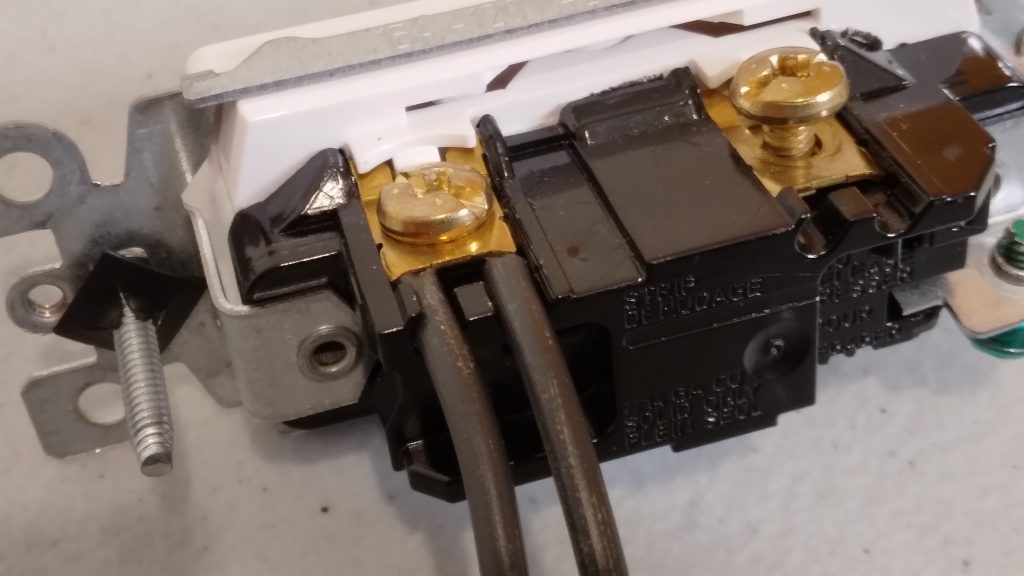
Many newer style switches have this and that makes it easy because you can just put both of the wires under the plate and tighten the terminal screw.
If you aren’t replacing the switch or the new switch doesn’t have room for two wires, then what you have to do is to pigtail the wires in the back.
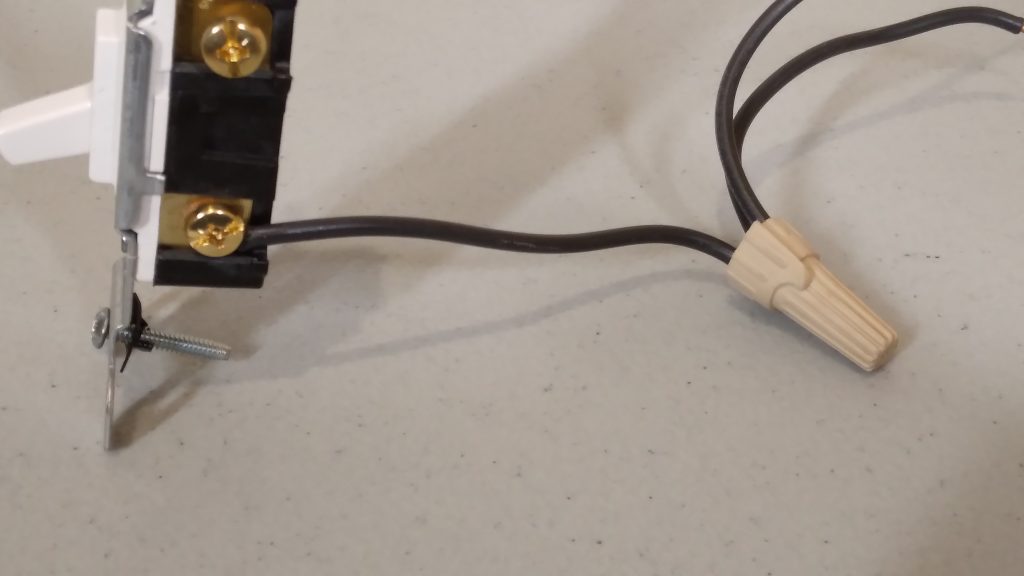
Connect the two wires that were under the terminal screw in the back of the box with a third wire, a pigtail wire. A pigtail is just a short piece of wire that goes from the wire nut to take that power to the terminal screw, so you only have one wire under the terminal screw.
Mistake #4: A wire wrapped the wrong way around a terminal screw
You may find a wire that’s wrapped around the terminal screw, but it’s wrapped around the wrong way, like this one.
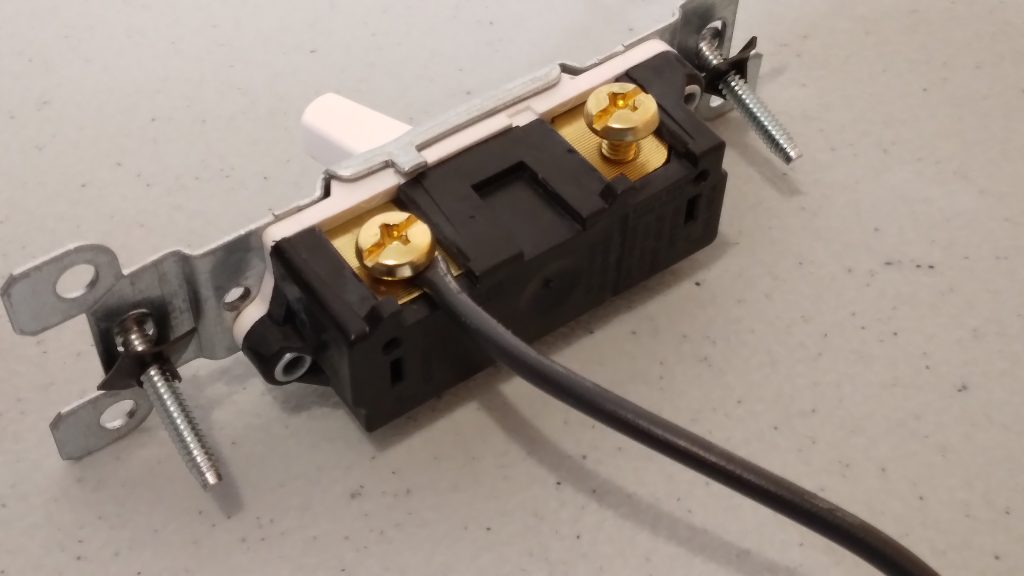
Wires should always be wrapped in the direction that the terminal screw gets tightened. This way when you tighten the terminal it pulls that wire even closer to the shaft of the terminal screw, making a better connection. If you find the wire attached in the incorrect direction, just take it off and reattach it in the correct direction.
Mistake #5: A wire stripped in the middle and wrapped around a terminal screw
Sometimes at a light switch you’ll find a line wire that has some insulation stripped off of the middle of it, and then it’s wrapped around the terminal screw, like this one.
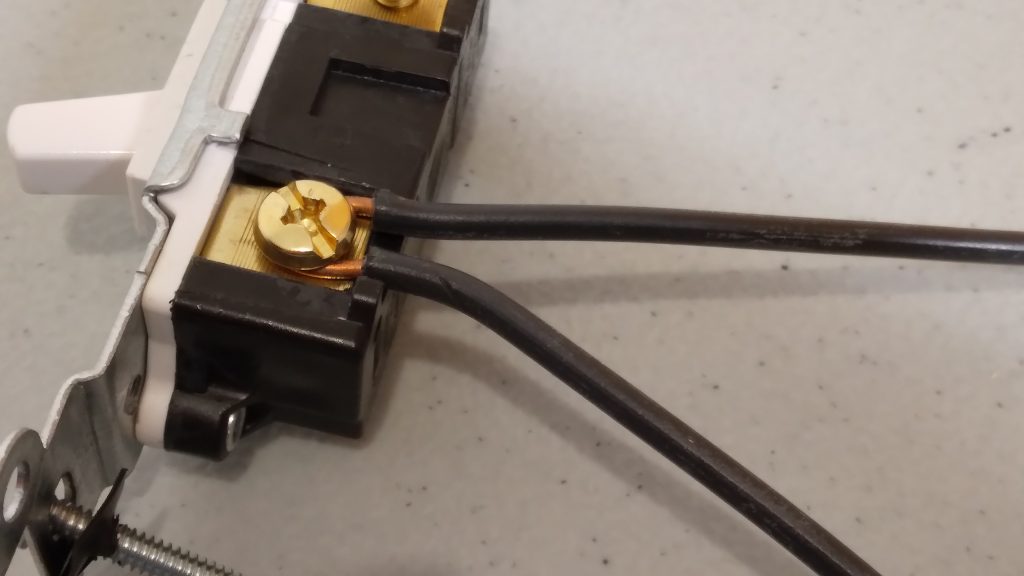
This is done again when they want that line wire to continue on to another switch. This is not best practice. What you want to do is to cut that wire and strip the two wires back. Then as I showed above, either put the two wires under a plate if your new switch has that feature or use a pigtail in the back of the box and bring that pigtail wire to the one terminal screw.
Mistake 6: A loose wire in a wire nut
If you have a light or an outlet that works intermittently, it may be that there is a loose wire in a wire nut, either in the box or in a junction box. I found this when we had one of our lights that wasn’t working all the time. I found in a junction box that one of the three wires under the wire nut had never been pre twisted and so it was loose and it wasn’t connecting properly. This often happens when they add an extra wire under a wire nut and don’t take the time to pre twist all of those wires. Make sure before you put any wire nut on that you pre twist the wires first. That makes sure you have a good connection and then you can put the wire nut on.
Mistake 7: A wire sticking out below the wire nut
If you see one or more of the black or white insulated wires that have been stripped back and you can see the bare wire below the wire nut like this, you need to fix it.
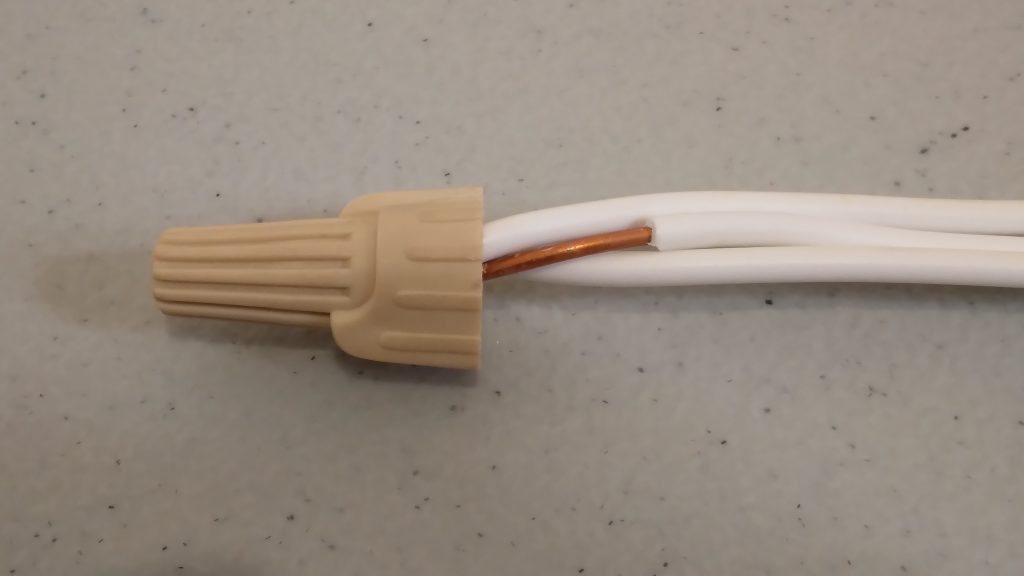
That bare wire could come in contact with another wire or the side of a metal box and it could cause real problems. Untwist the wire nut. Trim that long wire, pre-twist the wires and put the wire nut back on. Then you have a safe connection.
If you’d like to see the video where I explain these 7 mistakes, watch it below.
